Improbability Drive

Need a 10,000 random magical effects for a D&D game?

Gotcha covered!

There’s this thing called the Wild Magic Surge table which crops up occasionally in a given game of Dungeons and Dragons which causes about 50 differing magical effects such as shielding yourself or exploding but it has a cooler big brother with 10 thousand possibilities! Thing is this list is kind of a pain, selecting a random event from 10,000 possibilities is a bit of a hassle with just normal dice.

Enter my web app you can check out here.

Click the big friendly button and get your wacky new spell effect!

How’s it work?

So glad you asked, dear reader. All it does is read a local JSON file containing the 10,000 magical effects, pick one at random, and feed it into the spot where {EFFECT POPS UP HERE} starts off.

It’s bloody simple and doesn’t get much more user friendly than that.

Wanna check out the source code? Got you covered.

Based on The Net Libram of Random Magical Effects v2 by Orrex

Update

I made a re-skin of the application and have it rolling the standard 100 wild magic effects, see it in action here.

Wild magic application reskinned to look like it was from Stranger ThingsI had the bright idea that a D&D-based application was a damn good fit for that gritty laser effect Stranger Things did in their intro sequence paired up with a font called Marvin Visions, check it out and download it for free here!


To Do List

What’s it?

It’s a device I made/ programmed to display what movies I need to check out, chores I’m neglecting, what side projects I’ve ginned up to keep myself entertained.

Wanna see it running?

Of course you do!

Uh why?

Glen you fiendishly handsome devil, why do you need something like this? Well my flattering reader I do occasionally find myself watching a season of Rick & Morty that I’ve seen so many times I could probably rattle off the lines easier than the pledge of allegiance while guiltily thinking “aren’t there about a million things I want to check out right now, why can’t I remember a single one of them?”. I built this machine to stop myself from aimlessly slouching around on the couch… and because it looks super fly in my living room.

How’s it work (without mentioning a lick of actual code)?

Finer details can be found here in the repo

  1. A bit of code asks a Google sheet of mine for its contents
  2. Google feeds back the spreadsheet data to the code
  3. Another part of the code spits out the spreadsheet data as a neat little website
  4. Rinse and repeat every 15 minutes

Heavy-duty design or coding details

This is my testing ground for interesting layouts, new font usage, and seeing if I can make certain colors work together so the overall theme is “whatever looks cool”. If you refresh the list, a new theme will pop up. At the point in time I’m writing this, there are 3 different themes it cycles through on refresh.

Case design

custom etched to do list computer case

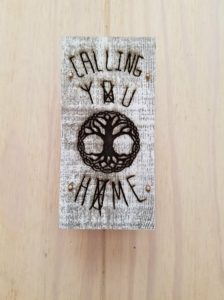
That’s a hand-drawn, laser engraved chunk of wood covering the front so buckle up kiddo, it’s a bit of a story.

Why “Calling You Home”?

So my brother and I were chilling out (possibly watching Rick & Morty again) and he remarked that my house had good vibes out the yin-yang… well what he actually said was that my house felt like a song by Seven Lions titled “Calling You Home” which he played for me and lemme tell ya, having the apartment I’ve put together compared to that song was one of the highest compliments I’ve ever been given.

After hearing it, I knew I would have to work that song into my home somewhere and being that I was already fixated on building a cool case for my motivational gizmo, I had a good idea of where it would end up. The only question left was how to make something which felt like that song and the case design you see is my answer.

Laser engraving

Did the engraving myself, I totally went out and got trained on how to work a big ol’ laser at a maker space called TC Maker (shout out!) in the twin cities.

How’d I code this beast?

The easiest way to explain is to check out the repo, in specific this file is where the party’s at.

The code work was probably the easiest part of this project as most of what I consider the tricky stuff was grabbed from an earlier project of mine so most of the focus was on making the code as easy to read as possible so the main custom.js file is TRICKED OUT with comments on what each line is doing.

Walk me through the steps, this time nerd it up!

You asked for it…

  1. Make call to Sheets API
  2. Wipe out any pre-existing cards
  3. Assign variable to JSON response length (var y)
  4. Create a card for each data set
  5. Fill the card with the corresponding data in an unordered list
  6. Do the whole song and dance again every 15 minutes
  7. Swap theme every 8 hours or so by randomly selecting a class from an array
  8. Remove old theme class
  9. Apply new theme class

TL;DR

I made a super techy and slick looking to-do list
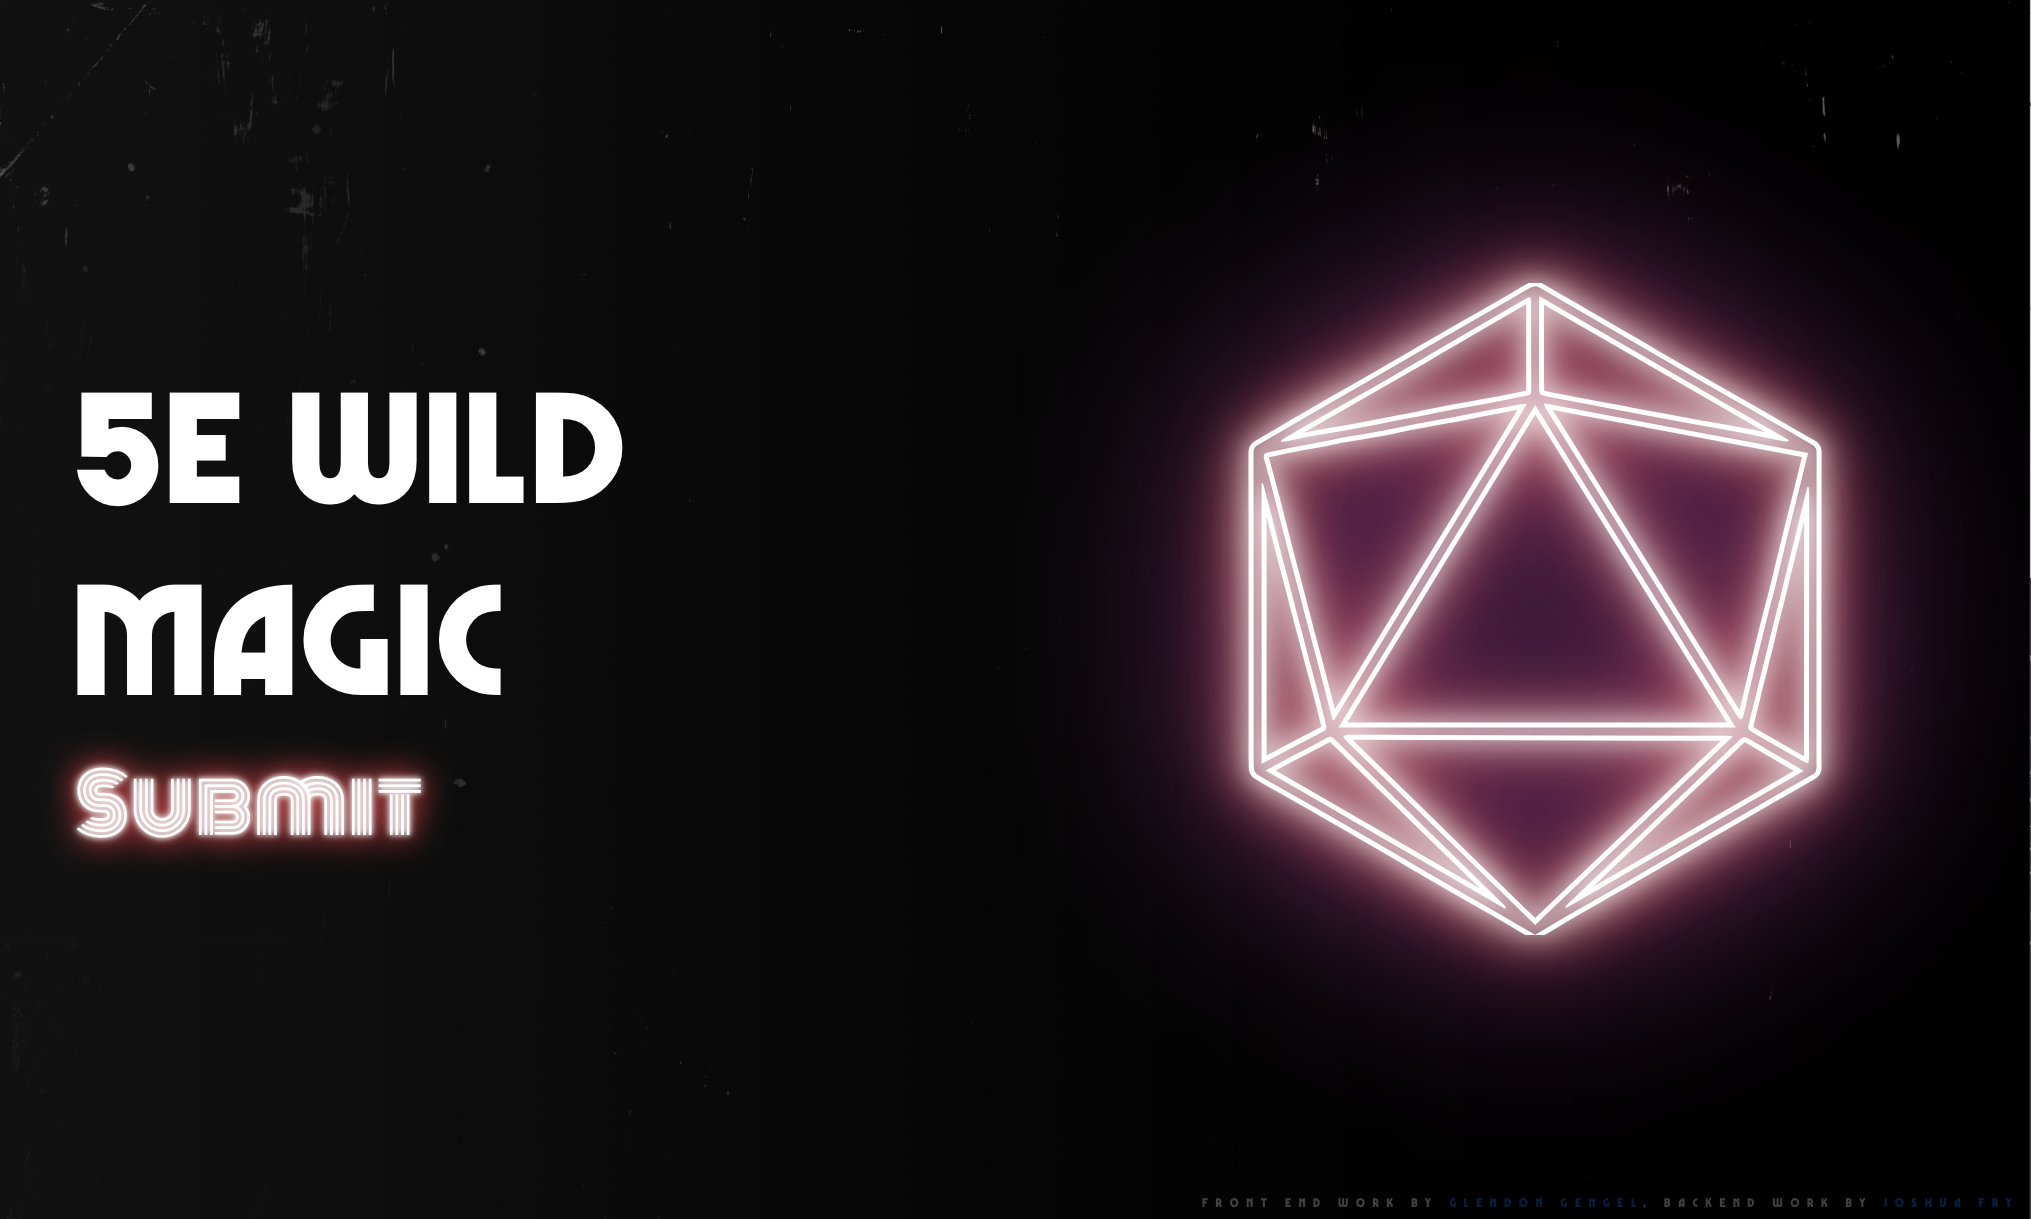

Charts Made From Sheets

There was no good how-to on making a responsive chart that pulls its data from a spreadsheet

So I made one!

Why this is useful: responsive web data visualization turns out to be a bigger headache than I was expecting with many plugins that claim to do the job but don’t. I really wanted some slick looking graphs for a client that anybody could edit so I decided to go build something from scratch.

The lynch pins that make all of this possible are Google Sheets API and Google Visualizations.

Sheets

Sheets uses a a simple URL query structure that only really needs an API key and the ID of the sheet you want to pull data from though I do add on a parameter to specify the cell range that should be grabbed.

Here’s that the URL query looks like: https://sheets.googleapis.com/v4/spreadsheets/155Ec2P5W4_9KROYbM3oyHJaUQLH9_THzQLZXjVyTn70/values/Sheet1!A1:A7/?key=AIzaSyAHqTdQfwbPHiEA1KF7VsYyPF0ZjBA4qVs kinda ugly, huh? Well it’s actually pretty quick and to the point– the first long string of gibberish is the sheet ID, the “/values/Sheet1!A1:A7/” specifies the cells to grab and the query at the end specifies the API token– the rest doesn’t change between sheets which makes much less of a headache than some API’s (looking at you Spotify!).

Visualizations

I’m not sure exactly what Google Visualizations would be considered, be it a program, framework, or formatting markup but the important thing is I can feed it data and it will throw back a shnazzy graph. You can specify a bunch of handy formatting options such as chart type, color of the graph, data ranges, and a whole bunch of other thing anybody who has ever built a chart in MS Word or Excel would be familiar with immediately. Unfortunately, there is one feature totally missing from this otherwise wonderful widget and it’s the ability to make the chart different sizes when viewed on different devices…

Make it responsive

The trick was to not declare a chart width in the chart’s JavaScript then create a chart resize function which triggers a half second after the screen has been resized. Why a half second, you ask? Turns out if you don’t have a small delay when drawing the chart the function will trigger for every pixel you change the screen width making it lag out if you are sliding the screen size around in a browser window.

The source for your viewing pleasure

Click here


Coinmarket API

I built a thing which stores and displays digital currency market data

Grab the repo and mess around with it here: https://github.com/haa-gg/Coin-Market-API-Example

More specifically, the goal is to create a script which talks to the Coin Market API (https://api.coinmarketcap.com/v1/ticker/) Note: this is a deprecated API and doesn’t work anymore, gets the relevant data for all 1000-something digital currencies out in the wild and puts the current values into a SQL database that I can refrence later. The live feed was more of a bi-product that I got attached to.

The heavy lifting of this project was to set up a database, write a SQL command to input the relevant data from the API into the database, then set the command to run once a day by means of a cron job.

Here’s the code you need to make the live feed section work, all neat n’ tidy

index.php

Here’s what makes the back end tick:

dbupdate.php (where the real action is)


This Site

I feel like I’m trying to describe a person…

Sounds easy for a second but then the fact people are pretty complicated settles in and you’re left feeling a bit overwhelmed. That’s the feeling I’m having as I write this– I’m very familiar with my own site but figuring out what information people are really interested in is a bit of a challenge. For this reason, this description will be broken down into 2 sections, the first dealing with all of the conceptual things like basic organization structure, look, and feel while section 2 will deal with the notable bits of tech wich make this whole site go.

Conceptual

Functions

The goal of this site was to show people what I am capable of in regards to my profession which bounces between graphic designer, web developer, and web designer depending on client needs. For that reason, the site was pretty easy to break down into smaller, common sense areas of focus.

Look and Feel

Musicians always seem to have the most fun with what represents them visually– T-shirts, posters, album covers, and of course, websites. I wanted to have a bit of that fun while still acknowledging my non-musical profession and keeping things pretty sharp and intuitive to use.

With a general direction in mind, it was off to the internet to see if any musicians had put together something which fit the bill. After bouncing around a bit, I realized the middlepoint was music applications such as Spotify or Soundcloud– a place where people were showing off their creative side through a clean, functional, and intuitive interface!

I took that general concept and ran with it– looking over different album covers to get an idea of what my “logo” would be and how the site would lay out on each device. After bouncing my concpets off a few helpful friends and family, it was time for some coding!

Technical

Post Types

The first area I though would be interesting was in making each individual project I worked on into a custom post category– either web development, graphic design, or web design which was just a matter of adding the “add category” button in the post menu.

Where the posts got more technical was in making the front page display only a featured post in each category.

Here’s what one of the front page loops looks like

	 1,
    'category_name' =>  'featured+web-development' 
);

$my_query = new WP_Query( $args );
while( $my_query->have_posts() ):
    $my_query->the_post();
    //the_title();
//the_post_thumbnail();
$url = wp_get_attachment_url( get_post_thumbnail_id($post->ID) );
echo '
'; endwhile; wp_reset_postdata(); ?>

The pages listing the projects specific to each category run off a similar loop displayed below:


'web-development' ); $my_query = new WP_Query( $args ); while( $my_query->have_posts() ): $my_query->the_post(); $url = wp_get_attachment_url( get_post_thumbnail_id($post->ID) ); echo '

'.get_the_title().'

'; endwhile; wp_reset_postdata(); ?>

I included the row classes because it has to be one of the most handy features in Flex Foundation, the small-up-x, medium-up-x, …etc automatically wrap columns down a “row” when they overflow on one line and can do so indefinitely.

Desktop Navigation

I had some fun with the SCSS on this! If you dig around the internet, there are quite a few tutorials on how to make a box animate on hover but 99% of what I found out in the wild did not work if the box was filled in with a solid background color (common example). I did find some animations which used box-shadow as the colored background animation layer this effect had serious flicker issues.

In the end, I wrote the animation from scratch and you can see an example of it on https://jsfiddle.net/0d3cjzbq/. I also have the menu loop and scss I used down here:

SCSS

 .logged-in{

    .desk-nav{
padding-top:2rem;
    }
  }

  .desk-nav{
    position:absolute;
    top:0;
    left:0;
    width:30%;
    z-index:100;
    @include mui-animation(slide(in,right));
  animation-duration: .5s; 

    .menu .active > a{
      background:#000;

    }

    ul{
      list-style-type:none;
      margin:0;


      li{
        margin:.5rem 0;
        display:block;

        a{
          background-color:#000;
          border-bottom:none;
          color:#fff;
          width:100%;
          max-width:300px;
          padding:.5rem 1rem;
          display:block;
          font-family:$serif;
          text-transform:uppercase;
          letter-spacing:.15rem;
  position:relative;
  overflow:hidden;
        } 

        a:hover, .menu .active > a:hover{
         // @include transition;
         background-color:transparent;   
        }

        a:after{
   transition: left ease-out 0.4s;
  content:"   ";
  width:100%;
  height:40px;
  display:flex;
  position:absolute;
  left:-100%;
  top:0px;
  z-index:-50;
 
}

&:nth-of-type(1) a:after{
background-color:$blue;
}

&:nth-of-type(2) a:after{
 background-color: #2a20f7;
}

&:nth-of-type(3) a:after{
 background-color: #6349ff;
}

&:nth-of-type(4) a:after{
  background-color:#e95fff;
}

&:nth-of-type(5) a:after{
  background-color: #ffb526;
}

&:nth-of-type(6) a:after{
  background-color: #ffe200;
}
}


a:hover:after{
  left:0;
}

      }
    }

Loop

 'menu_order', 'container_class' => 'menu-header')); ?>

The finished product…

…Is right in front of you, let me know what you think!


Regex Phone Fun

Websites are great and all but scripts can be a blast all on their own!

Here’s a phone flipping script I have been working on that will find every phone number on a page and flip them all to the same one, which is really handy for adwords tracking.

Just read through the code comments to see how the whole thing works, my end goal is to make it take in a url query, grab that number from a stored array and flip all of the numbers to that.

If you want to see it in action, check out: https://jsfiddle.net/uohx1fo3/15/

<?php  

jQuery(document).ready(function () {

//Throw the phone number you want everything to flip to right here
var swapTarget = '123-456-7890';

//This is the bit that recognises a phone number
var regex = /(((\(\d{3}\) ?)|(\d{3}-)|(\d{3}\.))?\d{3}(-|\.)\d{4})/g; 

//Tells the script where to search in the document
var text = jQuery("body:first").not('script').html();

//Makes the text var look for our regex and swap it for our new number 
text = text.replace(regex, swapTarget);

//Turns the text var loose on the DOM to switch out the phone numbers
jQuery("body").html(text);

/*===============================================
We've made it half way and nothing has erupted into flames, take a moment to pat yourself on the back and then check below to make sure you have the right vars set.
===============================================*/

//Format the swap target for an href
//swapTarget.text( swapTarget.text().replace('-', '') );
var swapTarget = '"tel:1' + swapTarget + '"';
console.log(swapTarget);

//Now to handle those pesky href numbers with a different selector...
var regex = /((\"tel:((\d{11})|(\d{10})|(((\(\d{3}\) ?)|(\d{3}-)|(\d{3}\.))?\d{3}(-|\.)\d{4}))\"))/g;

//Makes the text var look for our regex and swap it for our new number 
text = text.replace(regex, swapTarget);

//Fire the main cannons!
jQuery("body").html(text);


});

?>

Lawfirm LP

Law firm landing pages can have a great deal of dynamic content in them

The firms are also keen on looking dignified and professional so the pages can get to be quite a handful!

If you want to see this puppy in action, check out: https://designerofstuff.com/law-lp and play with the device types to see all the responsive love put into the page.

Most of the exciting bits involving putting locations in different arrays does not get used here as we don’t have addresses. However, we can swap the headline region by adding a ?camp=1 or ?camp=2 (https://designerofstuff.com/example-law-lp?camp=1) query to the end of the URL. We can also change out the geographic region from the default of “Minnesota” for something a bit more exciting like “Camelot” by adding a url query of ?geo=camelot (https://designerofstuff.com/law-lp?geo=camelot).

Take a look at what the dynamic php tends to look like to render proper geographic and headline info:

<?php  

//Setting phone as a var
$phone = "<a href=\"tel:1\">111-111-1111</a>"; 

$phonelink = "1";?>

<?php 
//Assign the $geo variable to whatever the ?geo= query is equal to
$geo = $_GET['geo'];

//Put all cities in a single array
$geo_arr = array ("minneapolis", "moscow", "camelot", "chicago", "los-angeles");

//Put the geos with small address sets in this array
$small_arr = array ();

//Put any small address geos with 2 addresses in here
$stack_arr = array ();

//This bad boy makes sure the geo query is a legit one and not some sketchy bit of SQL
if (in_array($geo, $geo_arr)){

    $geo_pos = array_search($geo, $geo_arr);

    $geo_active = $geo_arr[$geo_pos];

            //Detect if the geo has numbers in it and if it does, then go do some special formatting to it
    if (strcspn($geo_active, '0123456789') != strlen($geo_active)) {

        switch ($geo_active) {

//Throw the special snowlfake formatting cases in here
            case "twin-123":
            $geo_txt = "Twin Cities";
            break;

            case "twin-456":
            $geo_txt = "Twin Cities";
            break;

            case "twin-789":
            $geo_txt = "Twin Cities";
            break;
        }

    } 

    else{

//If the geo case is not a special snowflake, then just swap the dashes for spaces and capitalize verything properly
        $geo_txt = str_replace("-", " ",$geo_active);

        $geo_txt = ucwords($geo_txt);

    }
    
}

else{
//Putting in a default geo value in case somebody puts in a geo query we don't like or flubs the spelling
        $geo = "minnesota";

        $geo_txt = "Minnesota";
        
    }

//Checks if the active geo is supposed to be small address format
$format_var="big-addr";

if(in_array($geo_active,$small_arr)){

    $format_var="sm-addr";

}

//Extra formatting junk for small addresses w/ more than 1 address
$stack_var = "";
$stack_fmt = "";
if(in_array($geo_active,$stack_arr)){

    $stack_var="-stack";
    $stack_fmt="stack";

}

?>

<?php

//Uses gets device type in case we want something to render differently
$iphone = strpos($_SERVER['HTTP_USER_AGENT'],"iPhone");
$android = strpos($_SERVER['HTTP_USER_AGENT'],"Android");
$palmpre = strpos($_SERVER['HTTP_USER_AGENT'],"webOS");
$berry = strpos($_SERVER['HTTP_USER_AGENT'],"BlackBerry");
$ipod = strpos($_SERVER['HTTP_USER_AGENT'],"iPod");
$ipad = strpos($_SERVER['HTTP_USER_AGENT'],"iPad");

if ($iphone || $android || $palmpre || $ipod || $ipad || $berry == true) { 
           $device='mobile';
    } else {
         $device='desk';
    }

?>

<?php

//gets the &camp query and populates the headline with it
$haa_query_2 = $_GET['camp'];

switch ($haa_query_2) {

    case "1":
    $camp = 'Need Expert Legal Assistance?';
    break;

    case "2":
    $camp = 'Out To Fight A Ticket?';
    break;

    default:
    $camp = 'Are You In Trouble With The Law?';

}
?>

<?php 

    //Extra classes for the LP fed in as body classes
$extra_classes=array($device,'generic-law', $format_var, $stack_fmt); 
?>

Auto Srcset

A Handy Little Widget That Builds And Loads Images Based On Device Width

So there’s this nifty little property in HTML that will let the browser determine which size image to load based on how large it needs to display it. The only hassle is that these images are tedious to build since without any automation, you have to save each image at each different size. This is about as much fun as cleaning out an attic full of bats with an air horn so I came up with a handy way to make the computer do all the heavy lifting for me (now if only I could make it deal with the bats…).

In a nutshell, my widget uses a single line in a command prompt to trigger a process which feeds all images in a directory through a program called GraphicsMagic that resizes it to your specifications and outputs the images to their own directory. Once we have the image files, we can easily reference all of them using a simple PHP function detailed below.

Now for the nitty gritty on how each bit works!

Gulp/ Node Package Manager

The dependencies are crazy simple, this is all you need in your package.json

{
  "name": "RespImg",
  "version": "1.0.0",
  "description": "Image Sizing Example",
  "main": "index.js",
  "scripts": {
    "test": "echo \"Error: no test specified\" && exit 1"
  },
  "author": "glen",
  "license": "ISC",
  "devDependencies": {
   
    "gulp": "^3.9.1",
    "gulp-concat": "^2.6.0",
    "gulp-responsive-images": "*"
    
  }
}

All our NPM does is download Gulp, Gulp Concat (not necessary), and the responsive image plugin (you do need to manually download the binaries though).

As for our Gulp file, the basic setup is really simple:

var gulp = require('gulp');
var responsive = require('gulp-responsive-images');
 
gulp.task('responsive-img', function () {
  gulp.src('assets/images/*.{png,gif,jpg}')
    .pipe(responsive({
       '*': [{
        width: 300,
        suffix: '-s'
      }, {
        width: 500,
        suffix: '-m'
      }, {
        width: 600,
        suffix: '-l'
      }],
      
    }))
    .pipe(gulp.dest('assets/images/adaptive'));
});

If you open a command line in your project folder after the NPM install and type “gulp responsive-img” it will generate new copies of all images in our specified folder!

Handy Dandy PHP Function

We still need a good way of writing all the mind numbing srcset markup which is where my PHP function comes into play!


             class="responsive"
                     alt="Some text"/>


If you have any interest in a working set of files, you can download them here!


Hoglund Law

This is by far the largest site I have ever worked on

I’m supposed to give you an idea of what I know and what makes me tick. To do this, I am going to show you the 1800’s haunted mansion off in some Scottish moor I was ordered to restore, keeping the general look a feel while bringing the electrical, plumbing, and wifi up the the present century with the help of one seasoned craftsman. The site is http://hoglundlaw.com and the current progress can be viewed at http://hcm2017.wpengine.com. I will start with what we were handed and transition over to what we are doing.

The site we were handed was something created by a few motivated IT professionals who were going above and beyond the call of duty in an area outside what they specialized in. They took the Modernize theme, a readily available and easily customized theme for WordPress and switched around a few easily accessed options to make it unique. They then started posting blog articles, tinkered with custom post types, and build individual pages in a half-WYSIWYG interface with markup that made individual pages look good but were jarring and inconsistent taken as a whole. Once the base site was in place, they began experimenting with microsites and somebody must have LOVED them because by the time the senior dev and I were taken on board there were over 300 of them, most of which consisted of 5 pages. A geo specific landing page and 4 site links all of which differed from each other in very non-uniform ways.

The senior dev, James and I looked this sprawling mass over in my first week with the company and knew one day we would turn it into something to be proud of. We are now in the midst of reducing the number of sites down to one, the number of landing pages down to 5 instead of 300+ and the various pages written in a consistent manner with uniform markup.

I started with the city of landing pages, learning about how to make dynamic landing pages that would render geo-specific partials that would render specific maps, sets of addresses, headlines, and phone numbers so the page would feel custom tailored to what a user would find relevant based on where they were making their search from. The two lynch pins of this operation involved rendering specific partials based on custom queries in the ad-words url and a custom javascript function called via Google Tag Manager which would swap out phone numbers. The page hoglundlaw.com/ohio-social-security/?useHAAG=44 would give you a different set of maps, addresses and phone numbers versus http://hoglundlaw.com/ohio-social-security/?useHAAG=98. This change really got the ball rolling and the owners attention fixed on how we could build the rest of the site in a much smarter fashion as we reduced maintenance and general time to make small changes to the page by an order of magnitude. Making a change in one place instead of across something like 30 page just for a change to a quality statement they wanted for Ohio.

This opened the door the the full overhaul of the site which led to a few key changes in how major sections of how the site works. We swapped the attorney pages and everything involved with the locations pages over to custom post types instead of custom built pages (http://hoglundlaw.com/attorneys versus http://hcm2017.wpengine.com/attorneys/). We now generate these pages based of custom post loops.
The underlying framework changed as well from the more rookie friendly Modernize theme to the Foundationpress theme which offers dramatically better control and scaling for a dev willing to put in the time to make the theme into whatever they want. A few key aspects of the site this theme made better are that it is responsive versus adaptive (preset widths and breakpoints in pixels versus flexible shift points which work around the device), better access to Foundation CSS and JS framework (cooked right into the bare bones of the theme) and ultimately better user-friendliness to anybody with less experience looking to update some details on a page or adding a new attorney, location or author. The theme also comes with its own SASS transpiler which makes editing the look and feel of major elements a much more organized process than looking through a single, sprawling stylesheet.

A more nitty-gritty example of added utility we put into the site is related to adding an author info snippet to every blog article. Instead of every article being posted to http://hoglundlaw.com/hoglund-blog being attributed to the mysterious ‘Admin’ user except for a hard coded attorney name at the bottom of most posts, each will have a picture of the attorney, a quick bio about them and a link to all posts made by that attorney which you can see at http://hcm2017.wpengine.com/hoglund-blog/ . All of this magic comes into the post by way of this snippet:

<?php

/*=====================================

Begin the awesome author info box generator

=====================================*/

// Get Author Data

$author             = get_the_author();

$author_description = get_the_author_meta( 'description' );

$author_url         = esc_url( get_author_posts_url( get_the_author_meta( 'ID' ) ) );

//$author_avatar      = get_avatar( get_the_author_meta( 'user_email' ), apply_filters( 'wpex_author_bio_avatar_size', 75 ) );

$author_avatar      = true;

$author_clean = preg_replace('/\s+/', '-', $author);

$author_clean = strtolower($author_clean);

// Only display if author has a description

if ( $author_description ) : ?>

<div class="row auth-row">

<div class="columns small-2 auth-pic-col">

		<?php if ( $author_avatar ) { ?>

		<div class="author-avatar clr">

			<a href="<?php echo esc_url( $author_url ); ?>" rel="author">

				<?php //  echo userphoto_the_author_photo(); ?>

				<?php // TODO: finish this function ?>

				<div class="auth-pick">

					<img class="bottom" src="/wp-content/uploads/blog-authors/author-<?php echo $author_clean ?>.jpg"/>

					<img class="top" src="/wp-content/uploads/blog-authors/author-<?php echo $author_clean ?>-g.jpg"/>

				</div>

			</a>

		</div><!-- .author-avatar -->

		<?php } ?>

	</div>

	<div class="columns small-10 auth-desc-col">

		<h4 class="heading"><span><?php printf( esc_html__( 'Written by %s', 'text_domain' ), esc_html( $author ) ); ?></span></h4>

		<div class="author-description">

			<p><?php echo wp_kses_post( $author_description ); ?></p>

			<p><a href="<?php echo esc_url( $author_url ); ?>" title="<?php esc_html_e( 'View all author posts', 'text_domain' ); ?>"><?php esc_html_e( 'View all author posts', 'foundationpress' ); ?> →</a></p>

		</div><!-- .author-description -->

	</div>

</div>

<?php

/*=====================================

End the awesome author info box generator

=====================================*/

endif; ?>

Which was based off asking just the right question to Google, finding a snippet which does 75% of what we wanted then fine-tuning it to what we were looking for.


Website copyright 2023. All rights reser-- Nah, I'm just playing with ya, the whole thing is up on an open repo on github!

Feel free to use it, break it, fix it, trash it, change it, mail, upgrate it.